Best Ways To Replace Your Broken Garage Door Spring?

Torsion springs may be fixed in a matter of hours without the need for calling an expert if you have the proper tools and follow our instructions. This article will not discuss the extension spring systems in your garage door. Your garage door is a critical component of the structure of your home. It's a convenient addition that also enhances your home's exterior appeal. Numerous architects and builders place a premium on the aesthetics of their garage doors.
It will describe how to replace garage door springs with torsion springs attached to a bar above the door. If you live in an area where it is possible, you can save up to $200 by performing your own garage door spring replacement.
This is how springs function as a counterbalance to gravity. Maintaining the proper tension on your garage door's springs can make a significant difference, they serve as counterbalance forces.
Where to Begin Replacing Your Garage Door Spring?
The majority of people believe that the primary source of lifting force is their garage door opener. This is not true. As soon as the electronic opener is removed, you should be able to raise your door with a single touch of your finger.
When you purchase a new garage door, the springs are pre-tensioned. When you close your door, don't get tense. When your door lifts, it utilizes stored energy to propel itself away from the earth's gravitational pull. Additionally, they derive value from their garage door.
As a homeowner, your garage door is not the only issue of your concern. If installed properly, you can count on it to perform flawlessly for the remainder of its useful life. Your garage door is an integral aspect of the structure of your home. It is critical to keep it in good functioning order. However, do not overlook your springs. Avoid further harm by acting quickly in the event of a garage door malfunction. If you hear a big bang in the season of winter, you should take action promptly.
The First Step:
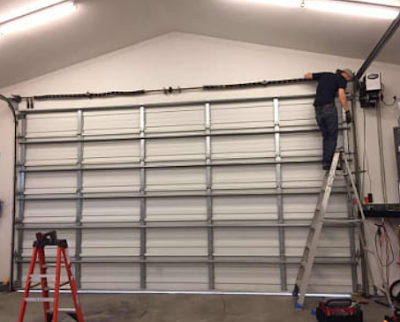
When the springs are winding or unwinding, position your ladder away from the cones. Reconnect the springs after removing the garage door opener and lowering the door to its lowest position. When repairing garage door springs, protect your eyes and hands with eye protection and leather gloves. Remove the ladder before removing and reinstalling the door. When attempting to open doors, caution should be exercised when using ladders.
The Second Step:
The excellent spring's bottom hole must be threaded with a winding bar. When loosening the two setscrews, ensure that the bar remains in position and does not slip out. As soon as the screws are released, the spring will compress violently. Retain a strong grip.
Third Step:
Now you can place the second winding bar into the hole at the position 9:00. It is advised to remove the bottom bar and start unwinding the spring a bit quarter leapfrog the wind bars in each turn. It is one of the miscellaneous steps to be considered.
Fourth Step:
When removed from the center bracket, the springs can be relocated. Before proceeding, verify that all nuts and bolts have been unscrewed and removed. Remove the two screws and nuts that secure the stationary spring cones to the center bracket. In this case, the springs should be relocated to the end brackets. Utilize locking pliers or a C-clamp to secure the torsion tube in place. Remove the set screws from the drums on the lift cable's left and right sides. Following that, unplug the drums' lift cords.
Fifth Step:
As long as you keep winding a rod within the cone, it will continue to climb. When quarter-turning the spring, avoid twisting the winding bars. The spring maker will determine this. If you have not gotten any guidance, 30 quarter rotations for a 7-foot-tall door and 36 for an 8-foot-tall door should be enough.
Sixth Step:
In the center, a new bearing has been placed. After adjusting the torsion bar to the left, slide and lock the center bearing into place. Before installing the bearing in the fixed cone, place the spring in the right spot. You can fix the drum. By reinstating it safely connects the middle bracket to both stationary cones.
Seventh Step:
Ensure that the winding bar is tapped before tightening the set screws. This technique simplifies the process of stretching the spring by approximately a quarter inch from the center. By twisting the set screws clockwise, ensure that the torsion tube is in contact with them. This should be repeated 12 to 34 times following that. Excessive screw tightening might cause the torsion tube to crack or bend.
Read More about garage door information and tips


Comments
Post a Comment